

Showing posts with label knitting. Show all posts
Showing posts with label knitting. Show all posts
Friday, January 20, 2017
Finding new passions: something old is new again


Wednesday, November 23, 2016
Holiday knitting: keep warm with a few of my favorite free patterns
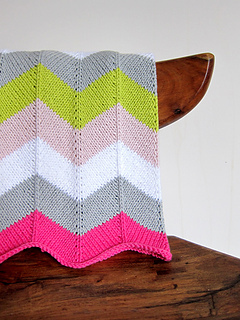 I love to spend time with the family during the holidays, but I also know that at some point during the festivities I will need a break. At some point after dinner, when the football comes on TV, and kids start getting out their games... that's when I break out the knitting needles, find a comfy chair, and settle in! Whether you need a break from the crowd, or you need to get ahead of your gift knitting, stay warm with a few of my favorite free patterns to work during the holidays!
Sunday, October 2, 2016
Creepy and cute: My 5 favorite Halloween knitting patterns on ravelry

Tuesday, May 3, 2016
Mother's day: free knitting pattern

Sunday, October 4, 2015
Quick cold weather projects

I need a quick project that I can enjoy this weekend, in this chilly air: Arm warmers ;D
Sunday, March 8, 2015
Mini Batts: bite-sized fibers

Sunday, February 22, 2015
Break from the fibers: Custom Cosette
 It's easy for me to get lost in dying and spinning these days, so it's always a treat when someone comes to me with a really special request for one of my handmade dolls. In this case it's Cosette!
Wednesday, November 26, 2014
Holiday spinning: another fractal experiment
 |
| plied yarn pre-wash. |
Check out another of my favorite fractal stripe experiments, this time in green and gray.
Saturday, October 5, 2013
Whether I'm painting, quilting, or spinning, I'm always looking for inspiration... and here it is!
OK, so it's no secret that autumn is my favorite time of year... and mostly because the of the amazing show the garden puts on just as it nears the end.
This week was the first chance I had to catch it on camera. As I let the dogs out one morning, I noticed the sun coming through the red maple leaves which already have such a beautiful color palette of dark reds and purples. But when the sun comes through them you get a whole other experience of olives and golden tones.


Then there was the peppermint. It gets these cute purple flowers on the end of vine like stalks, which normally hold dark green leaves, but now are beginning to turn pink with touches of yellow!


OK, so it's no secret that autumn is my favorite time of year... and mostly because the of the amazing show the garden puts on just as it nears the end.
This week was the first chance I had to catch it on camera. As I let the dogs out one morning, I noticed the sun coming through the red maple leaves which already have such a beautiful color palette of dark reds and purples. But when the sun comes through them you get a whole other experience of olives and golden tones.


Then there was the peppermint. It gets these cute purple flowers on the end of vine like stalks, which normally hold dark green leaves, but now are beginning to turn pink with touches of yellow!


The miniature pink roses are actually still in bloom, but have begun to show these pumpkin like "hips" that are perfectly suited for the season. This crazy ornamental grass just showed up in my garden this year(I think it blew in from the neighbors yard), but it's a great fit. And with it's purple plumes on blue-green stalks, it has a subtle cool palette that I can't resist!


Saturday, September 28, 2013
A little overboard?
OK, I may have overdone it... but with the holidays coming up, gifts to make, and travel time to spend knitting, I think I was justified. So it all started when I saw that WintryFlowerByDesign is having a sale! With the prices as good as they are, the awesome color combos I was looking for, and the high quality fibers, I couldn't resist.
First, I wanted something soft and durable to make a scarf for a good friend... She likes an earthy olive green, but everything I found was just so green! Then I saw this "Mer" and thought how perfect that will be spun up and knit together... it has an overall green feel, but so much variation. Beautiful!
Then I saw the alpaca in a similar color way, but with a little more pink. It also has the hint of grey that silver alpaca lends. I can spin or ply this with my undyed sliver alpaca fiber for the most amazing shawl! I'm thinking "Nuvem" by Martina Behm.
And finally, I saw "Painting the night sky" and knew this was the colorway I needed for my halloween cowl. Perfect for trick or treating in the crisp October air. I better get started! Check out my ravelry project page for updates on these projects, and others.
But wait, what's this in the bottom of the box? A FREE sample of another amazing merino fiber.
First, I wanted something soft and durable to make a scarf for a good friend... She likes an earthy olive green, but everything I found was just so green! Then I saw this "Mer" and thought how perfect that will be spun up and knit together... it has an overall green feel, but so much variation. Beautiful!
Then I saw the alpaca in a similar color way, but with a little more pink. It also has the hint of grey that silver alpaca lends. I can spin or ply this with my undyed sliver alpaca fiber for the most amazing shawl! I'm thinking "Nuvem" by Martina Behm.
And finally, I saw "Painting the night sky" and knew this was the colorway I needed for my halloween cowl. Perfect for trick or treating in the crisp October air. I better get started! Check out my ravelry project page for updates on these projects, and others.
But wait, what's this in the bottom of the box? A FREE sample of another amazing merino fiber.
Talented and generous ;D


Tuesday, September 3, 2013
What's on the wheel
Well, after completing a worsted spun lace weight single (6.25oz) of this beautiful merino top from wintryflowerbydesign on etsy, I set it aside to rest and moved on.
My next project is this awesome kitchen sink batt I got on a recent trip to NY. It's got everything from alpaca to nylon, merino and others... And omg, the colors! The main colors are green and blue, but there are hints of rust pink and purple that really make it unique.

So what's the plan for this amazing fiber?
Well, I know I want to use it to make myself a scarf for my November trip to London. And I know I'd like it to be as unique in texture as it is in color, so I'm going with a thick and thin single. But there's a lot of variation in there so I'm going to tie it all together by plying it with a navy single I'm spinning from some really soft merino I picked up ages ago ( bonus points for stash busting with this one!)
And so far I'm feeling pretty good about this plan... I haven't exactly chosen a pattern yet, but I think I'll go for something in a simple stockinette in order to really let the yarn show, and get it done in time for the trip. Maybe something with some embellishments too, like a couple of cute buttons. If you have any suggestions feel free to send them my way...
I started spinning this batt by peeling apart the layers of color so that they were mostly in one color family but with a little bit of accent to it. So I have teal and green sections with accents of rosé, and purple blue sections with accents of beige... Take a look, it reminds me of a real patchwork quilt ;D

My next project is this awesome kitchen sink batt I got on a recent trip to NY. It's got everything from alpaca to nylon, merino and others... And omg, the colors! The main colors are green and blue, but there are hints of rust pink and purple that really make it unique.
So what's the plan for this amazing fiber?
Well, I know I want to use it to make myself a scarf for my November trip to London. And I know I'd like it to be as unique in texture as it is in color, so I'm going with a thick and thin single. But there's a lot of variation in there so I'm going to tie it all together by plying it with a navy single I'm spinning from some really soft merino I picked up ages ago ( bonus points for stash busting with this one!)
And so far I'm feeling pretty good about this plan... I haven't exactly chosen a pattern yet, but I think I'll go for something in a simple stockinette in order to really let the yarn show, and get it done in time for the trip. Maybe something with some embellishments too, like a couple of cute buttons. If you have any suggestions feel free to send them my way...
I started spinning this batt by peeling apart the layers of color so that they were mostly in one color family but with a little bit of accent to it. So I have teal and green sections with accents of rosé, and purple blue sections with accents of beige... Take a look, it reminds me of a real patchwork quilt ;D
Sunday, January 27, 2013
the creative process
Since I've been away for a while, I thought it was only fair to share what I've been up to... some of it anyway ;D
So as I work through my latest project, I'm going to bring you along. This project is a valentines bunny that I've envisioned in a classic, vintage, and even a little french inspired look. Rather than waiting until it's done, I thought I'd provide updates as I go... so let's get started!


You can check out some more pics in my etsy shop where she'll be listed for sale, so stop by and let me know what you think!
Thanks for following along ;D
Dawn.
So as I work through my latest project, I'm going to bring you along. This project is a valentines bunny that I've envisioned in a classic, vintage, and even a little french inspired look. Rather than waiting until it's done, I thought I'd provide updates as I go... so let's get started!

1/22/2013: Sometimes I begin with a sketch, but this time I began with the wool. I had recently purchased a lot of random wool, and so I got in there to investigate. When I saw all the variation in color and texture I thought about a soft bunny, and the special nature of hand spun wool. What I always loved about hand spun is not when it's perfect, but when you can really tell that it's hand spun. The thicks and thin, and silky mixed with fluffy, what would make a better bunny. So I pull out the mix I think will embody those characteristics, weigh it up, and get carding.

1/26/2013: Next step is spinning. I have a ladybug spinning wheel, and I have been known to lose myself spending a few hours spinning. But don't get me wrong, the repetitive motion can take it's toll and I've had to declare self imposed bans on spinning (and sometimes knitting and crocheting too) from time to time. In this case, I needed to spend a few hours to spin the single ply. And since I want to create a strong, quality item, I've decided to spin my singles thin and ply them together for a 2 ply wool. Once it's plied, I'll soak the yarn so it can bloom, and set the twist.

1/26/2013: While waiting for the yarn to dry, I can work on other things; like choosing fabrics and working out the dress pattern on paper. I usually work out as much as I can from existing or estimated measurements, and then make adjustments once the final doll is done. For this one I'm choosing some french prints in florals and toile, and rich rose and olive tones.

2/3/2013: With the yarn plied and set, it's time to get the hook out. I start by crocheting the ears and arms of my bunnies so that they're ready to attach when I need them. I'm really enjoying the way the variation in the yarn is working out, both in the color and the texture.

2/7/2013: With the exception of the foot bottom, my bunny's all pieced together and ready for stuffing. I use a combination of bamboo and polyfil stuffing, and whatever yarn and fabric scraps I happen to have around. The polyfil gives the spongy quality, while the bamboo and scraps give the firmer texture you want in the bottom and feet. The stuffing tool is great for this type of work since I work the doll in one piece and stuff the entire body through the legs!

2/9/2013: And with my bunny stuffed, I'm ready to complete her feet. Usually I like to cap off the feet with a coordinated fabric to match the dress; but I'm loving the wool so much that I've decided to wet felt 2 small pieces and use them to create the soles of her feet. It's not too difficult, if you have some roving or carded fiber, just layer the fiber out in thin perpendicular layers. Use a spray bottle to wet it down with warm soapy water, then message it into a flat sheet of felt with a gloved hand or another smooth item (I sometimes use a smooth river rock). In the detail phase, I'll most likely embroider in some toes since her feet are a little bare.

2/14/2013: So from fluff to finished, here she is! I pieced the skirt together from 2 inch strips of that awesome moda fabric you saw in the beginning of the post, and then decided to make a dark burgundy ruffle trim to set it off. Serging and stitching all the edges as I went, I used the same burgundy for straps and the waist band that ties the back together in a bow. Then I picked out some gorgeous glass eyes in a rose tint, and set them over a camel colored felt. I embroidered her nose and freckles in a dark brown, and her knees and toes in the cream colored hand spun I used for the rest of her body.
Thanks for following along ;D
Dawn.
Monday, March 26, 2012
Doing the math: increase and decrease evenly row over row
I've recently received a few questions about a technique used in many of my patterns:
"SC across, INCR 3sts evenly over each of the next rows, trying not to place increases in the same place row over row."
Firstly, the instructions are written this way to allow flexibility and ease of creation. Once you understand it, it's easier to complete using the "technique" versus tracking each row on a pattern sheet(especially if you happen to be travelling). And if you are creating more than one, it allows you to find the formula that you like the best (although I know I do it differently every time!)
OK, now for the math! The formula works thusly...
random number(Stitch count of row/Number of Inc)
Explanation:
OK, say you have 24 stitches in the row, and you need to increase 3.
Now how about decreases? Same thing...
OK, say you have 24 stitches in the row, and you need to decrease 3.
I hope this helps make the pattern instructions clearer ;D
"SC across, INCR 3sts evenly over each of the next rows, trying not to place increases in the same place row over row."
Firstly, the instructions are written this way to allow flexibility and ease of creation. Once you understand it, it's easier to complete using the "technique" versus tracking each row on a pattern sheet(especially if you happen to be travelling). And if you are creating more than one, it allows you to find the formula that you like the best (although I know I do it differently every time!)
OK, now for the math! The formula works thusly...
random number(Stitch count of row/Number of Inc)
Explanation:
OK, say you have 24 stitches in the row, and you need to increase 3.
- 24/3=8
- now choose a random number from 1 to 8, let's pick 5... meaning we'll increase in the 5th stitch of our repeat
- so we'll work the row like this: SC next 4 sts, inc1 in next st (the 5th st), SC next 3
- repeat 2 more times to complete the row, for a total of 27 sts.
- do this as many times as the pattern calls, just choose a different random number every time (at least 2 higher or lower than the previous row).
Now how about decreases? Same thing...
OK, say you have 24 stitches in the row, and you need to decrease 3.
- 24/3=8
- now choose a random number from 1 to 8, let's pick 5... meaning we'll start our decrease on the 5th stitch
- so we'll work the row like this: SC next 4 sts, dec1 in next 2 sts, SC next 2
- repeat 2 more times to complete the row, for a total of 21 sts.
- do this as many times as the pattern calls, just choose a different random number every time (at least 2 higher or lower than the previous row).
I hope this helps make the pattern instructions clearer ;D
Monday, May 23, 2011
Ami of the month: May

Bonjour Cosette!
She's this month's FO... featuring the most lovely handspun yarn I picked up at YarnParty2011 from Mid Valley Fibers. As a matter of fact it was the yarn that inspired the doll. I love this colorway called "Sunset over water", and I had a great time matching the fabrics in her apron skirt! To me she looks like blue skies and sunshine ;D
You can see more in my etsy shop!
Monday, March 28, 2011
I spoiled myself at yarnparty 2011

How could I resist, it was my birthday after all ;D
It all started a few weeks ago when my awesome husband asked, "any special requests for your birthday?"... well since you asked! And off we drove to Savage, Maryland. When we got there I was a little concerned because parking was a challenge(the place was packed!), but once a got inside the Savage Mill building I was pleasantly surprised. It's a charming place filled with little shops including paper crafts, pet stuff, paintings, beads, quilts, and more. So we made our way over to the main hall where the yarn party was being held and walked on in (no fee to get in!). The floor was crowded but manageable, and I made my first sweep around the room in about 5 minutes. Then in the next 2 passes I picked up all the items I had my eyes on and well... I came home with a great big bag of fancy hand dyed, hand spun, hand sheared, and all around awesome fibers... so I thought I'd share my favorites with you here!


Sunday, January 30, 2011
February CAL???
Well, now that the holiday hustle is over... I'm thinking about our next CAL ;D
Of course February means Valentines day (at least it does in my house) so I automatically started thinking of love birds, puppy love, and all that stuff. But maybe your not into Valentine's mushiness? So I want to hear from you! What do you want to see in our next CAL?
BTW: I've opened it up on the ravelry group too... join us over there for more about our next CAL!
Of course February means Valentines day (at least it does in my house) so I automatically started thinking of love birds, puppy love, and all that stuff. But maybe your not into Valentine's mushiness? So I want to hear from you! What do you want to see in our next CAL?
BTW: I've opened it up on the ravelry group too... join us over there for more about our next CAL!
Tuesday, November 30, 2010
Murray (the merry) reindeer

It's Christmas time, and I have an early gift for you...
As promised, our December CAL is a brand new reindeer pattern! You can download the pattern here, or on ravelry, and then join the ravelry group to share your progress.
Thanks for your support this year, and happy holidays to all!
Dawn.
Thursday, October 28, 2010
Custom needle case

I can't believe I didn't do this sooner!
I just got back from a great trip with the hubby, and this little needle case was awesome to carry all my knit/crochet stuff. I made it just before we left after realizing that the only bag I had big enough to carry all my yarn had no pockets for needles or anything. Then I remembered I had this absolutely adorable kitten fabric laying around (I had actually been hoarding it for a project worthy of it's cuteness!)... And voila ;D
I know there are a few patterns available on the web, but here's mine which used exactly 2 fat quarters, and a 12 inch piece of ribbon:
Cut your 2 fat quarters so you have 2 pieces 5x18 inches, and 2 pieces 18x18 inches.
A. Stitch the 2 smaller pieces together (right sides facing) as shown in diagram using .5 inch seams. Clip the corners and turn right side out. This is the pocket piece.
B. Lay out one of the larger pieces right side up. Place the pocket piece just made on top and sew pocket separations as indicated in diagram B. You can place as many as you like here, evenly spaced or not.
C. Fold ribbon tie in half and stitch in place as shown. Stitch as close to the edge of the fabric as possible to avoid stitches showing when everything is done.
D. Now take the final large piece of fabric and lay it on top (with right sides facing) and stitch as shown in diagram D, using .25 inch seam. Clip corners and turn out through opening left in the bottom edge. Press and top stitch bottom edge to close.
Enjoy ;D
Click on the diagram below to enlarge:

In my photo you'll notice I didn't use ribbon, that's because I had enough fabric to make a tie. This is simple 2 pieces of 1.5 x 12.5 inch fabric stitched together(right sides facing) with .25 inch seam leaving 1 inch opening on one of the long edges, corners clipped, turned right side out, and pressed.

Subscribe to:
Posts (Atom)