
Showing posts with label sewing. Show all posts
Showing posts with label sewing. Show all posts
Sunday, February 12, 2017
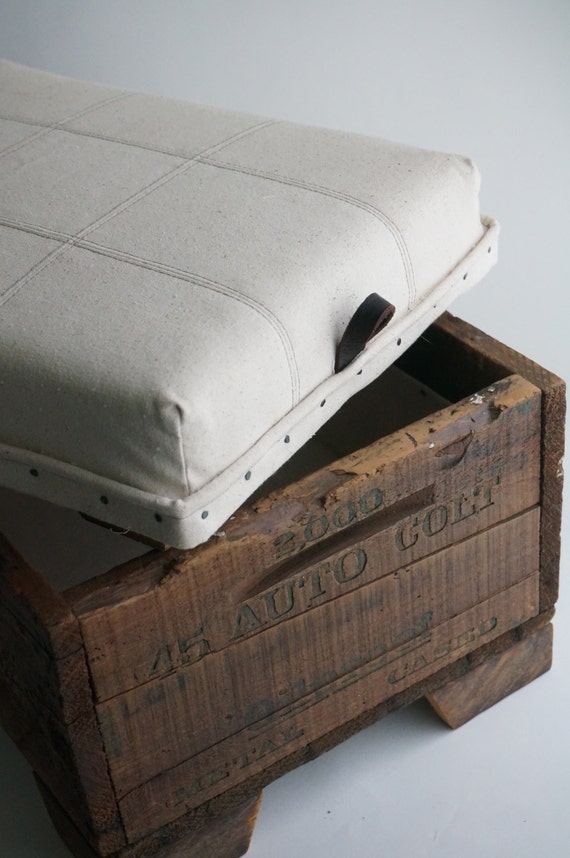
DIY project: wooden crate upcycle


Saturday, January 21, 2017
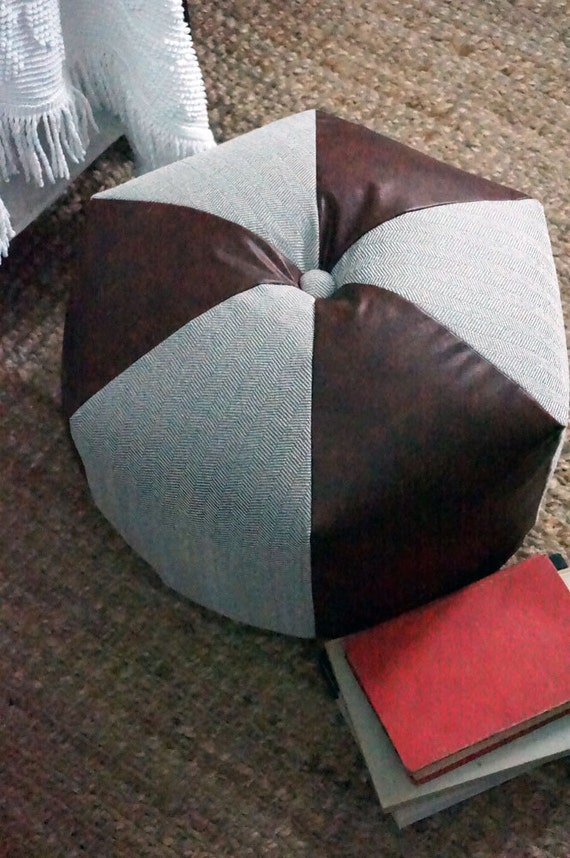
DIY project: pouf ottoman
Monday, September 26, 2016
DIY fashion: Custom tailored schoolboy blazer, for her!

Picture it: You're out at the thrift shop and you spot this beautiful hounds tooth jacket! Only to find it's a men's size 40... If you know what I'm talking about, this project is for you! With a little work (and some sewing skills) you can tailor your very own custom look! Don't believe it? Well grab that jacket, because I'm about to show you how I transformed this thrift shop find into my go-to fall style!
Sunday, August 7, 2016
DIY project: modern styled dog bed on a budget!
 OK we've all been there, at the pet supply or local big box chain... staring at the mountain of pet beds thinking: "which will go better with my living room decor; pink bones or black and red paw print?" The answer is neither, they are both ridiculous... Now I'm not saying you can't find some really nice options out there, but have you seen those prices?!? Equally ridiculous if you ask me! If you want to create a special spot all for your pup, that doesn't hurt to look at AND doesn't break your budget... you've come to the right place. I'll share multiple options, at various skill levels, using things you already have (or can purchase for no more than $20)!
Sunday, June 19, 2016
Deck chair makeover

So you might remember that I was on vacation a few weeks ago. I was lucky enough to be able to take a beautiful cruise to Bermuda! This particular cruise gave us about 3 days at sea, which (for me) means finding a quiet corner (away from all the families swimming, partying, and generally obnoxious crowds). This week I'm recreating the lounge that became my private little nook for reading, knitting, and overall relaxing. In this post I'll explain it all; including shopping, finding, and creating everything that went into my new favorite summer spot ;D
Thursday, May 26, 2016
Love seat makeover: modern farmhouse original
 When I'm out at the flea markets, estate sales, garage sales... I will inevitably come across some amazing thing, at an amazing price, but that I absolutely do not need. That's when I get out my phone and reach out to family and friends... and that was the case when I came across this fantastic little love seat in a local thrift shop. My mom was the first person that popped into my head, since I knew she had a room to refurnish and wasn't looking to spend a lot. But finding and buying this little treasure was just the beginning, the real story is the awesome transformation it went through to become a one of a kind piece she will enjoy for years!
Saturday, April 9, 2016
How to re-upholster a chair in 2 weekends: part 2
 Well, here we are... back for part 2, and ready to get this project done! In this post we'll take this piece from a bare frame to a completed chair. From paint to padding, piping to pillows, let's get it done ;D
Sunday, February 28, 2016
How to re-upholster a chair in 2 weekends: part 1
 Recently I've been inspired to upholster everything I see... especially chairs! Why chairs? Well they're versatile; can be used alone, in a group, in any room. They're low commitment; inexpensive, quick to finish. And they're easy to find; estate sales, thrift shops, flea markets. I've done 3 in a row (each project lasting about 2 weekends), and so now that I'm starting to get into a real rhythm I though I'd share my process!
Monday, March 26, 2012
Doing the math: increase and decrease evenly row over row
I've recently received a few questions about a technique used in many of my patterns:
"SC across, INCR 3sts evenly over each of the next rows, trying not to place increases in the same place row over row."
Firstly, the instructions are written this way to allow flexibility and ease of creation. Once you understand it, it's easier to complete using the "technique" versus tracking each row on a pattern sheet(especially if you happen to be travelling). And if you are creating more than one, it allows you to find the formula that you like the best (although I know I do it differently every time!)
OK, now for the math! The formula works thusly...
random number(Stitch count of row/Number of Inc)
Explanation:
OK, say you have 24 stitches in the row, and you need to increase 3.
Now how about decreases? Same thing...
OK, say you have 24 stitches in the row, and you need to decrease 3.
I hope this helps make the pattern instructions clearer ;D
"SC across, INCR 3sts evenly over each of the next rows, trying not to place increases in the same place row over row."
Firstly, the instructions are written this way to allow flexibility and ease of creation. Once you understand it, it's easier to complete using the "technique" versus tracking each row on a pattern sheet(especially if you happen to be travelling). And if you are creating more than one, it allows you to find the formula that you like the best (although I know I do it differently every time!)
OK, now for the math! The formula works thusly...
random number(Stitch count of row/Number of Inc)
Explanation:
OK, say you have 24 stitches in the row, and you need to increase 3.
- 24/3=8
- now choose a random number from 1 to 8, let's pick 5... meaning we'll increase in the 5th stitch of our repeat
- so we'll work the row like this: SC next 4 sts, inc1 in next st (the 5th st), SC next 3
- repeat 2 more times to complete the row, for a total of 27 sts.
- do this as many times as the pattern calls, just choose a different random number every time (at least 2 higher or lower than the previous row).
Now how about decreases? Same thing...
OK, say you have 24 stitches in the row, and you need to decrease 3.
- 24/3=8
- now choose a random number from 1 to 8, let's pick 5... meaning we'll start our decrease on the 5th stitch
- so we'll work the row like this: SC next 4 sts, dec1 in next 2 sts, SC next 2
- repeat 2 more times to complete the row, for a total of 21 sts.
- do this as many times as the pattern calls, just choose a different random number every time (at least 2 higher or lower than the previous row).
I hope this helps make the pattern instructions clearer ;D
Thursday, October 28, 2010
Custom needle case

I can't believe I didn't do this sooner!
I just got back from a great trip with the hubby, and this little needle case was awesome to carry all my knit/crochet stuff. I made it just before we left after realizing that the only bag I had big enough to carry all my yarn had no pockets for needles or anything. Then I remembered I had this absolutely adorable kitten fabric laying around (I had actually been hoarding it for a project worthy of it's cuteness!)... And voila ;D
I know there are a few patterns available on the web, but here's mine which used exactly 2 fat quarters, and a 12 inch piece of ribbon:
Cut your 2 fat quarters so you have 2 pieces 5x18 inches, and 2 pieces 18x18 inches.
A. Stitch the 2 smaller pieces together (right sides facing) as shown in diagram using .5 inch seams. Clip the corners and turn right side out. This is the pocket piece.
B. Lay out one of the larger pieces right side up. Place the pocket piece just made on top and sew pocket separations as indicated in diagram B. You can place as many as you like here, evenly spaced or not.
C. Fold ribbon tie in half and stitch in place as shown. Stitch as close to the edge of the fabric as possible to avoid stitches showing when everything is done.
D. Now take the final large piece of fabric and lay it on top (with right sides facing) and stitch as shown in diagram D, using .25 inch seam. Clip corners and turn out through opening left in the bottom edge. Press and top stitch bottom edge to close.
Enjoy ;D
Click on the diagram below to enlarge:

In my photo you'll notice I didn't use ribbon, that's because I had enough fabric to make a tie. This is simple 2 pieces of 1.5 x 12.5 inch fabric stitched together(right sides facing) with .25 inch seam leaving 1 inch opening on one of the long edges, corners clipped, turned right side out, and pressed.

Sunday, June 20, 2010
Ami wants a new pair of shoes...

So it's been on my mind for a while, if my ami's can have removable sweaters, dresses, shorts, etc. then why not shoes? Well now they can! It took a little longer than I had hoped, but I've finally worked out the best shoe pattern for my ready to wear line. The first try you see here is for a custom order you can check out on my custom order blog... a casual sneaker for a recent grad. After some trimming and finishing touches I think it'll be a perfect match for her swim shorts and college t-shirt. I used a denim, backed with fusible interfacing and medium whale cord for the soles. The tongue and inside sole is lined with blue cotton, and hides all seams! This little pattern is so versatile, look forward to lots of variations. Pattern should be available in my etsy shop as early as next week!

Subscribe to:
Posts (Atom)