I created this pattern a while ago,(check out the original post) but I always come back to it. Not only is it a great way to use up small amounts of upholstery fabric, but it's super customizable; every pouf I've made has a style completely it's own! There are a number of pouf patterns out there, both free and $$$... What I'm sharing today is more of a technique than a pattern, but I hope it inspires you to make one of your own!
First things first: gather and cut out the pieces
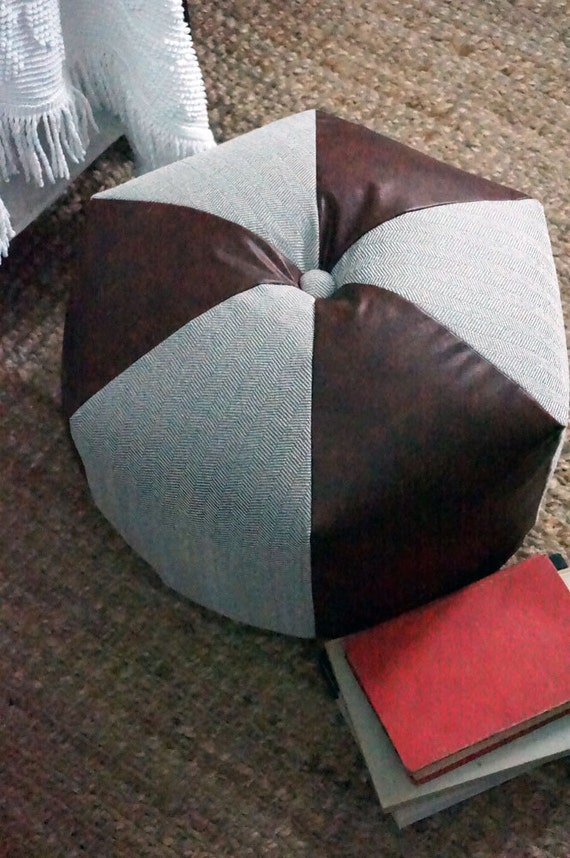
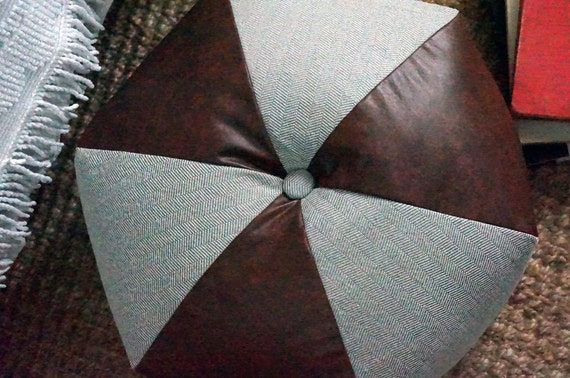
The top and sides of my ottoman measure about 18 inches long and 10 inches wide. For this one, I'm combining a faux leather with a soft gray herringbone fabric. This means I'll need less than half a yard of each! The bottom is usually some canvas or duck cloth. Sturdy enough to handle the ware of being slid around the floor. As far as notions: one 14 or 12 inch zipper, and one button for tufting the top of the ottoman.

Next: stitch everything together
With right sides together, and using a .5 inch seam allowance, I'll stitch the top and sides together while alternating fabrics as I go. With that complete, I'll move on to inserting the zipper in the bottom pieces. And lastly, attach the bottom piece to the top!


Finally: finish and stuff
Almost done now... just a few more steps! Turn the whole piece right side out through the zipper opening. You could stuff the piece just like this, but I like to line the inside with .5 inch upholstery foam to ensure you don't see and stuffing lumps from the outside. Cut 6 pieces that fit the inside the top and side pieces. I like to use a little upholstery tack spray to keep them in place while I finish stuffing. But before I do that, I'll make and attach the button tuft in the top. To finish stuffing, I like to use a combination of fabric scraps and polyfil or bamboo stuffing. The fabric gives the pieces the weight and solid feel you want in this piece, but the polyfill provides just enough cushion to keep it comfy!


That's it! Ready to make your own? Awesome... be sure to come back and let me know how it went! Not ready yet, but like what you see... that's great too, because you can actually find this and other handmade items in my etsy shop right now ;D
No comments:
Post a Comment