 I love the french country look, and I know I'm not the only one... Pick up any decorator magazine and you can find those rustic natural elements accenting even the sleekest of modern designer rooms. So today I'm going to show you how I created one of the most versatile pieces of furniture; the cottage footstool.
Making the frame
First of all, we need to gather supplies. Wood for the frame of the stool should be a hard wood like oak or poplar, but if it's not going to get heavy use you can get away with pine. I like to start with 2x2 inch poplar, cutting four 12 inch pieces for each of the corner posts. I'll then use 3/4 inch dowels for the connecting rungs; cutting four each in 10 and 16 inch lengths. This gives me finished stool dimensions of 18 inches wide, 12 inches deep, and 12 inches tall.


Next up is turning the legs. Of course this means you'll need a lathe, which is my new favorite tool! If you don't have one, you can always search flea markets for old chairs or foot stools that are in need of repair. Repurposing is a great option and can often cost less than making this piece from scratch! But if you want to give this a try, just place the first 2x2 into the lathe and create the spindle you love. Here I used a Jenny Lind (or spool style) style leg between where the rungs are placed. Once the first one is created, you can use it as a template for the rest; just mark where the pattern details are (such as each bead in this pattern). I also find it's easier to get into a groove, and complete all four legs in one sitting, for the most consistent result. Once the legs are done, just drill holes for the rungs, glue, clamp, and paint (or stain if you prefer).

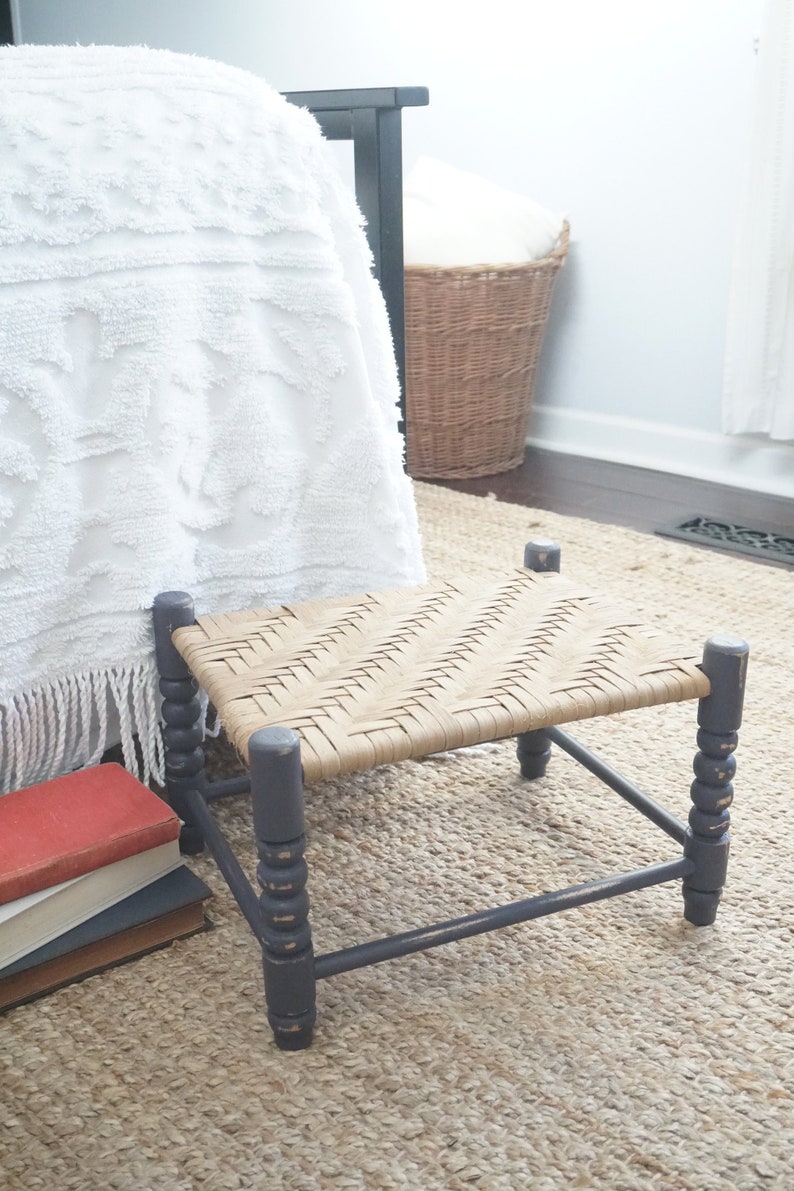
The herringbone weave
Next up is a first for me: the woven reed top. I have to admit, I've always admired the look of these woven reed pieces, even though they are always in awful condition by the time I get them. A signature of the 19th and early 20th century American furniture, they can often be found at flea markets of New England; almost always in either basket weave or herringbone pattern. The herringbone patttern is a variation of the basket weave (over 3 under 3) but with every pass the pattern steps by one.
Start by wrapping the warp; wrapping the reed up and over the front rung from underneath, then up and over the back rung, and continue covering the surface from right to left. (see first picture below)
Herringbone pattern:
First pass: [over 3 under 3] repeat [] to end
Second pass: over 2, [under 3, over 3] repeat [] to end
Third pass: over 1, [under 3, over 3] repeat [] to end
Fourth pass: [under 3, over 3] repeat [] to end
The back can be worked in regular basket weave.


OK, that's all for now; on to the next project! Want to know what it is? Follow me on twitter or instagram for sneak peeks and updates! If you're just looking for DIY inspiration, stayed tuned @ dawntoussaint.com for more on my DIY projects through the year! And if you're looking to get some of the items you've seen here on my blog, on twitter, or on my boards, just head over to my etsy shop!
No comments:
Post a Comment