 If you look at this chair and think "where's the dumpster", then we really need to talk! Restoring little treasures like this is my passion, and in this post I'll show you how easy it can be... From start to finish, in 2 short days, we'll turn this into an heirloom that can be handed down for 100 (more) years ;D
OK, let's get started (day 1)
Good news is that this chair is really in great shape, especially for being around 100 years old! The frame is in tact with no cracks or major chips, not even wobbly. This is the first thing I look for in a restoration, not because it's a deal breaker but really because it helps judge how much time/effort will go into the restoration. So this should be a quick one! I'll start by removing the original seat, which is no problem given that it's already falling apart! Next I'll get to sanding the frame lightly. I'm sanding lightly because I plan to paint this piece. Now I know some people really don't like the idea of painting an antique, but with a real utilitarian piece like this I don't mind. For me, if paint will protect the finish so it can be used for generations to come... that's what really matters. So I'll sand the frame until it's nice and smooth, because any rough spots will really show through the paint finish. I like to use a sanding sponge just because they have a grip, and edges to get into grooves! Finally, I'll clean up the dust with a tack cloth, which is like a cheese cloth fabric that's made sticky so it picks up all the sanding dust.


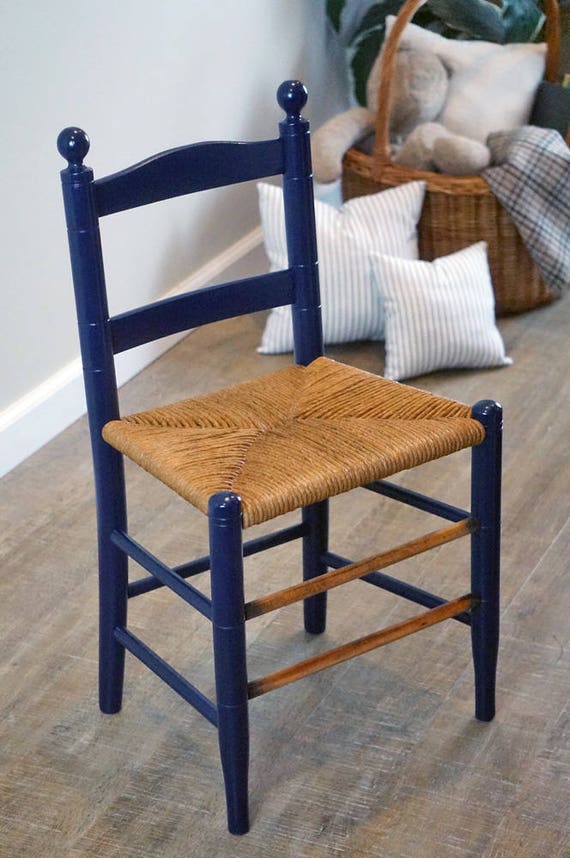
With the frame sanded and wiped down, we're ready to paint. With something like this, I like to use a spray paint; it gives a smooth finish in just a few coats, it's less than $5 a bottle, and comes in lots of colors and finishes. Today I'm choosing a navy blue in gloss finish. The navy is a classic neutral color, that will ensure this will not quickly go out of style. I'm also going to tape off the front 2 rungs. For this I'll sand down to bare wood and finish with a clear finish. That provides just a nice throwback to the vintage nature of the piece, and also ties in to the woven rush seat we're about to add!
Next up, the seat! (day 2)
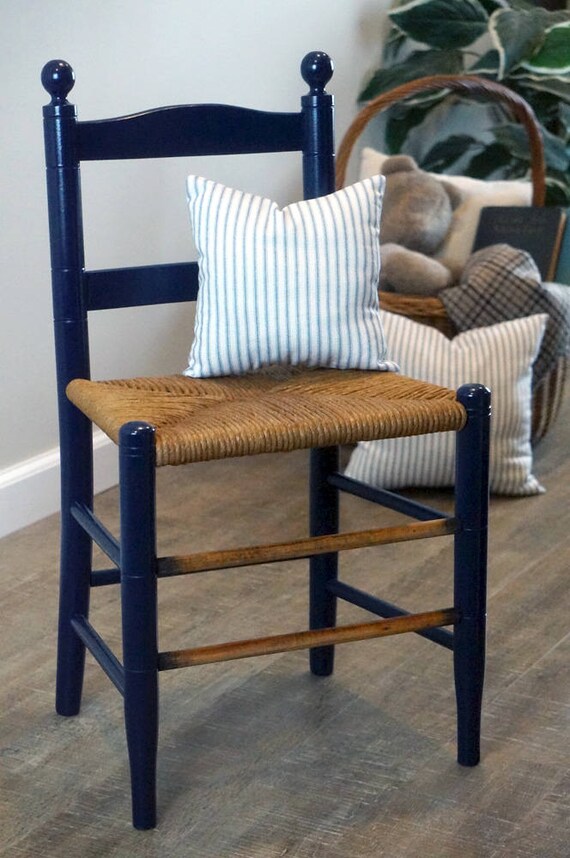
For this type of classic ladder back chair, I'm going to add a simple rush seat. Weaving a rush seat is something that can be learned... and really just takes a little practice. If you're interested in learning, I would recommend taking a stroll around youTube! Fiber rush can be found online for reasonable prices, and for a seat like this I would get about 2 pounds (it's usually sold by the pound). This seat is pretty standard, although it is a little bit wider in the front than in the back. That means I'll have to weave a few passes around the front to even it up before continuing to weave around all 4 corners. And for a seat this small, you'll be done in no time! Last step is to add a protective finish to the wood and rush; clear varnish. And the chair is complete!
For this type of classic ladder back chair, I'm going to add a simple rush seat. Weaving a rush seat is something that can be learned... and really just takes a little practice. If you're interested in learning, I would recommend taking a stroll around youTube! Fiber rush can be found online for reasonable prices, and for a seat like this I would get about 2 pounds (it's usually sold by the pound). This seat is pretty standard, although it is a little bit wider in the front than in the back. That means I'll have to weave a few passes around the front to even it up before continuing to weave around all 4 corners. And for a seat this small, you'll be done in no time! Last step is to add a protective finish to the wood and rush; clear varnish. And the chair is complete!


Of course I had one final add! The navy blue of the chair reminded me of french blue ticking and so: a tiny pair of accent pillows ;D


And that's it! Of course, in order for me to continue to find and restore all these little treasures, I have to also find new homes for them... and that's why you'll find this one available in my etsy shop!
OK, that's all for now; on to the next project! Want to know what it is? Follow me on twitter for sneak peeks and updates! If you're just looking for DIY inspiration, stayed tuned @ dawntoussaint.com for more on my DIY projects through the year! And if you're looking to get some of the items you've seen here on my blog, on twitter, or on my boards, just head over to my etsy shop!
This comment has been removed by a blog administrator.
ReplyDeleteHey There. I found your blog using msn. This is a very well written article. I’ll be sure to bookmark it and come back to read more of your useful info. Thanks for the post. I’ll definitely return. sedie vintage in ferro
ReplyDelete