Picture it: You're out at the thrift shop and you spot this beautiful hounds tooth jacket! Only to find it's a men's size 40... If you know what I'm talking about, this project is for you! With a little work (and some sewing skills) you can tailor your very own custom look! Don't believe it? Well grab that jacket, because I'm about to show you how I transformed this thrift shop find into my go-to fall style!
First, find that jacket!
This is the easiest step, because there is never a shortage of men's coats in the thrift shops. In fact, that's why I began looking for ways to re-purpose them! For this project you want to find one that is larger than what you would normally wear, so you have the flexibility to remove and reuse as much as necessary. Second thing to consider is the pattern. If you choose a busy pattern, you may have extra work ahead of you to ensure pattern alignment in the finished product. Alternately, you may be able to create a very stylized look by purposefully changing that pattern alignment... this is your style, your choice!
Next, check your fit.
When I put on this jacket in the thrift shop, I knew exactly what needed to be done: shoulders were too wide, underarms too low, sleeves too wide, fit too boxy, overall length too long. From top to bottom, this is the order we will tackle each of these challenges! The reason is that each adjustment will affect the others; for example, taking in the shoulders or under arms may affect the length of the sleeve. If you have a dress form, this is a huge help (and is worth the cost if you plan on doing much tailoring), but it doesn't take the place of trying on the garment. So as I work, I will pin or bast any change in order to try it on... allowing me to make adjustments before committing to the change!
Let's get cutting!
I'll start by opening up the shoulder seams, and taking out the shoulder pads. Then I'll bast those seams closed in order to take in the shoulders. For this, I'm going to make some darts; pinch and pin from the center top of the shoulder to approx 6 inches down in the front and back (see images). Bast those darts in place and try on to make adjustments... Were about to do something dramatic!
 | ||
| shoulder marked in. |
 |
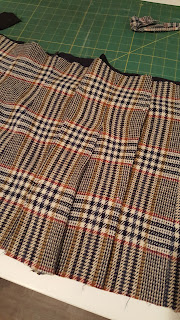
| removing the bottom to shorten the length |
For now, I'll set aside the bottom piece and continue adjusting the top. I need to turn my piece inside out and stitch the shoulder darts on the wrong side following my basting stitches, and clip the extra fabric. Then I'll pin and stitch the arm and underarm to fit!
With the top adjustments made, it's time to move back to the bottom section. I'll measure the length of this section that remains, and compare it to the length I would like it to be; still need to take off about 5 inches...
I can only take about 1.5 off the bottom, so the rest will have to come out of the mid-section; meaning I will lose one of the original buttons. I can live with that! With that piece removed, it's time to get this jacket back together!
 |
| Taking up the bottom of the jacket |
taking off more from the mid section
putting it back together!
This part can be tricky, but we're going to join the top and bottom back together. With the top section right side out, and the bottom section wrong side out (aka inside out), I'll begin by matching up the center back seam of the top and bottom sections with right sides facing. From there, I'll work all the way around (both the outer fabric and lining) easing and aligning seams as I go. About halfway around, I'll actually push the top section down inside the bottom section to make this work easier. Take this to the machine and stitch one long seam around. Clip anywhere you stitched over seams to lessen the bulk, then push the top section the rest of the way through the bottom section to turn the jacket right-side-out. We hove only one thing left to do; fold up and hem the bottom seam! You can always top stitch this seam, but I'm choosing to blind stitch this one by hand, only because I don't have enough thread remaining to top stitch in the color I would've liked ;D
With all the seams complete, all that's left is to press and wear!
OK, that's all for now; on to the next project! Want to know what it is? Follow me on twitter for sneak peeks and updates! If you're just looking for DIY inspiration, stayed tuned @ dawntoussaint.com for more on my DIY projects through the year! If you're looking to get some of the items you've seen here, on twitter, or on my boards, check out my etsy shop!


It took me only one three-piece suit to understand the beauty of custom tailoring. Simply wow!
ReplyDelete