
Finding the glass
There are lots of different sources of glass, so I like to put it in 2 categories: Fleamarket or Recycled. Glass from the fleamarket; this could be anything from depression glass, to old apothecary bottles, to more recent houseware glass. These can range from very expensive to very affordable, but can make for a really beautiful finished piece! Then there's recycled glass; this would be anything you would throw into your recycle bin such as wine bottles, olive jars, and even spent candle jars. I'm starting with recycled glass since (1)I happen already have it on hand and (2) practicing on free resources might give me the confidence to work with the more expensive stuff later!
Working with glass
If your glass doesn't have a screw on top, or if the top doesn't bother you, you don't have to worry about cutting. But if you have a large wine bottle, and want to make it into a jar, you'll need to consider a few things... There are a few tutorials online for cutting glass without tools, usually involving fire, but I've chosen to invest in a tool for cutting. it's not a big investment, just $20 online, and really easy to use. The tool allows you to measure out and score a straight line on a round bottle. Then all you need to do is alternate between running hot and cold water over the score line until the glass simply parts itself. While I do recommend getting a tool like this, it does take a little practice; I think I messed up at least 3-4 bottles before I got the hang of it. Lastly, the cutting leaves you with a sharp edge that really isn't safe. You'll need to get some wet/dry sandpaper (80/150/300 grits at least), working from coarsest to finest around the cut edge until it's super smooth, keeping it wet as you go. You can continue with finer paper if you like, upwards of 4000! But I'm not planning on drinking from any of my projects so I won't go that far. One last thing to remember; as you sand you should really wear a mask! Fine particles of glass are not something you want to inhale and trap in your lungs, so get a good mask from your local hardware store.
At this point, you might be done... but the designer in me wants to go just a little bit further. Here are a few ways to add wood accents and take this upcycle to the next level!
Custom vase or wood base candle holder
This may look complicated, but if you're a crafty upcycler you probably have a few thoughts on how you could source the right stuff for this project. Search the flea markets for old wooden coasters, bun feet (short chunky furniture legs), even small wooden bowls; all of these make great bases for a custom look without to much work.
Kitchen jars
The quickest way to create a lid for your jar would be to use a lathe. But even if you're not a wood-turner (is that a word?) you can still make this one... As long as you have a fine saw(dremel, jig saw, coping saw, etc.), glue, and some sand paper. Measure the inside opening of your jar and cut a circle to fit from a .25 or .5 inch thick board, then cut another circle about .25 to .5 inches bigger in diameter. Center the smaller on the bigger circle and glue them together. Sand down the rough edges and you're done!
So here are some examples of my recent glass upcycle projects:
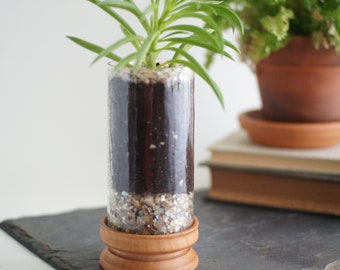 |
| Hand turned base made of cherry wood, gives the feel of an old apothecary style jar. |
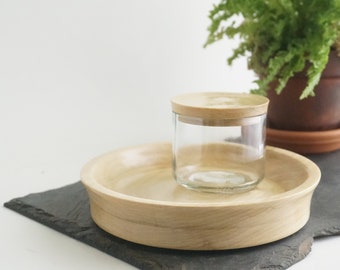 |
| This simple jar and platter combo are perfect for a modern powder room. |
 |
| This intricate base really shows how much you can elevate the look of a simple bottle. |
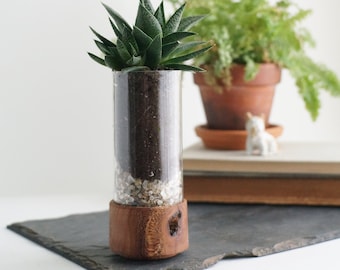 |
| With found wood like this sycamore, a simple design highlights the natural grain and knots. |
OK, that's all for now; on to the next project! Want to know what it is? Follow me on twitter or instagram for sneak peeks and updates! If you're just looking for DIY inspiration, stayed tuned @ dawntoussaint.com for more on my DIY projects through the year! And if you're looking to get some of the items you've seen here on my blog, on twitter, or on my boards, just head over to my etsy shop!
Super, vous avez trouvé cet article de notre chaîne sur YouTube. Et nous sommes si heureux d'apprendre que vous l'avez trouvé inspirant! Si vous recherchez d'autres projets de bricolage, veuillez consulter notre vidéothèque sur YouTube.
ReplyDeleteHi thanks for sharring this
ReplyDeleteeskort eryaman,
ReplyDeleteEryaman eskort bayan,
Eryaman eskort,
Eskort Bayan,
LJ0X
Ataşehir eskort
ReplyDeleteKadıköy eskort
Bostancı eskort
Ümraniye eskort
İstanbul eskort
Anadolu Yakası eskort
eskort bayan
445